nginxは、Webサーバーやリバースプロキシに使われるソフトウェアの一つです。WebサーバーといえばApache HTTP Serverを思い浮かべる人も多いと思いますが、近年ではnginxも非常に人気があります。事実、Webサーバーのシェアにおいて国内のみならず世界的にみてもApacheを抜いてnginxが1位を獲得しているとの調査結果もあります。
人気の理由はApacheと比較しても性能が高く、リソースの消費も少ないことが挙げられます。nginxの人気はこの先も当分続くでしょう。
この記事では、今最も人気のあるnginxでWebサーバーを構築する方法を説明します。また単純な構築方法以外に、次の設定方法を解説します。
- マルチドメイン(バーチャルホスト)対応
- HTTPS(SSL化)対応
なお、ここでの例でOSはUbuntuの利用を前提としています。
nginxでWebサーバーを構築する
nginxのインストール
nginxのパッケージは、Ubuntuのリポジトリで提供されています。aptコマンドを使ってインストールします。
パッケージをインストールする前に、まずパッケージ一覧を更新します。
$ sudo apt update次にnginxパッケージをインストールします。
$ sudo apt install nginxnginxの起動
nginxが自動起動されるように設定がされているか確認します。「enabled」と表示されれば、OS起動時に自動的にnginxが開始されます。
$ sudo systemctl is-enabled nginx
enabled
次にnginxが起動しているか確認します。
$ sudo systemctl status nginx「Active: active (running)」と表示されれば、nginxは起動しています。
ファイヤーウォールの設定
ファイヤーウォールを設定します。WebサーバーなのでHTTPの80番ポートとHTTPSの443番ポートをファイヤーウォールで許可します。
まずは現状のファイヤーウォールの設定を確認します。
$ sudo ufw status「Status: active」と表示されていればファイヤーウォールは起動しています。起動していない場合(「Status: inactive」と表示された場合)は、次のコマンドで起動します。
$ sudo ufw enableデフォルトでは次のようにファイヤーウォールで何も許可されていないと思います。
$ sudo ufw status
Status: active
80番ポート(HTTP)と443番ポート(HTTPS)の通信を許可するように設定します。まずは、ufwのアプリケーションプロファイルのリストを確認します。
$ sudo ufw app list
Available applications:
  Nginx Full
  Nginx HTTP
  Nginx HTTPS
  OpenSSH
次の3つのプロファイルはNginxをインストールで追加されたものです。
  Nginx Full
  Nginx HTTP
  Nginx HTTPS
「Nginx Full」を許可するとTCPの80番、443番ポートが開かれ、「Nginx HTTP」を許可するとTCPの80番ポート、「Nginx HTTPS」はTCPの443番ポートだけが開放されます。
プロファイルの情報は次のコマンドで確認できます。
$ sudo ufw app info 'Nginx Full'
Profile: Nginx Full
Title: Web Server (Nginx, HTTP + HTTPS)
Description: Small, but very powerful and efficient web server

Ports:
  80,443/tcp
ここでは80番、443番ポートを開放するので「Nginx Full」を許可します。ついでに22番ポート(SSH)についても許可します。
$ sudo ufw allow 'Nginx Full'
$ sudo ufw allow OpenSSH
許可後の設定を確認します。
$ sudo ufw status
Status: active

To                         Action      From
--                         ------      ----
OpenSSH                    ALLOW       Anywhere
Nginx Full                 ALLOW       Anywhere
OpenSSH (v6)               ALLOW       Anywhere (v6)
Nginx Full (v6)            ALLOW       Anywhere (v6)
変更した内容を読み込むためにファイヤーウォールをリロードを実施します。
$ sudo ufw reload
Firewall reloaded
Webサーバーの動作確認
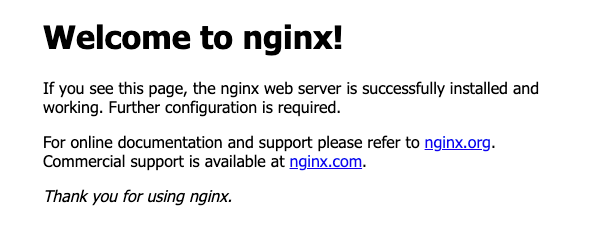
ここまでの設定が完了すれば、Webサーバーとして動作しているはずですので、正常に動作しているか確認します。
ウェブブラウザで次のURLでアクセスしてみましょう。
http://IPアドレスまたはFQDN/次のようにnginxのサンプルページが表示されれば正常に稼働しています。
設定ファイルの確認
nginxの設定ファイルを覗いてみましょう。nginxの主な設定ファイルは次の2つです。
/etc/nginx/nginx.conf
/etc/nginx/sites-available/default
おそらくですが、Ubuntuの設定ファイルの構造は少し特殊です。serverディレクティブは、nginx.confファイルに直接記述されているのが普通だと思われますが、Ubuntuの場合は/etc/nginx/sites-availableディレクトリの個別ファイルに記述されています。
そして次のように/etc/nginx/sites-enabledに、このファイルへのリンクが張られています。
$ ls -l /etc/nginx/sites-enabled
total 0
lrwxrwxrwx 1 root root 34 Feb  6 23:49 default -> /etc/nginx/sites-available/default
/etc/nginx/sites-enabledディレクトリのファイルは、nginx.confで次のように読み込む設定がされていますので、結果的にリンクを通して/etc/nginx/sites-available/defaultが読み込まれます。
include /etc/nginx/sites-enabled/*;通常は「nginx missing sites-available directory」に記載があるとおり、このような構造になっていないようです。
ただし、この設定ファイルの構造は次に説明するバーチャルホストを追加する場合に便利です。
Webページの公開
あとはHTMLファイルなどを配置すればWebページを公開できます。
ドキュメントルートの設定は/etc/nginx/sites-available/defaultファイルに記載されています。
root /var/www/html;/var/www/htmlディレクトリの下に公開するWebページを配置しましょう。
このあとは、マルチドメイン(バーチャルホスト)やHTTPS(SSL化)について説明します。
マルチドメイン・バーチャルホストの設定
マルチドメインもバーチャルホストも、大体同じ意味で使われることが多いです。
マルチドメインは複数のドメインを1つのサーバでホストすることを意味します。例えば「http://foo.example.com/path/to/file」というULRでアクセスがあった場合は、foo.example.comドメイン用の/path/to/fileというファイルを返しますが、「http://bar.example.com/path/to/file」というULRでアクセスがあった場合は、bar.example.comドメイン用の/path/to/fileを返すことができます。
これはユーザーからすると「foo.example.com」をホストするWebサーバーと「bar.example.com」をホストするWebサーバーが別々に存在するように見えます。しかし、実際には1つのWebサーバーが仮想的に2つのWebサーバーがあるように振る舞っているだけです。この仮想的なWebサーバーのことをバーチャルホストと呼びます。
それでは実際にバーチャルホストの設定を追加しましょう。ここでは「foo.example.com」と「bar.example.com」の2つのドメインをホストするように設定していきます。
/etc/nginx/sites-available/defaultにバーチャルホストの設定例がありますので、これを参考に進めて行きます。
# Virtual Host configuration for example.com
#
# You can move that to a different file under sites-available/ and symlink that
# to sites-enabled/ to enable it.
#
#server {
#	listen 80;
#	listen [::]:80;
#
#	server_name example.com;
#
#	root /var/www/example.com;
#	index index.html;
#
#	location / {
#		try_files $uri $uri/ =404;
#	}
#}
各ドメインのドキュメントルートディレクトリを作成する
最初に各ドメイン用のドキュメントルートディレクトリを作成します。ディレクトリはドメイン名で作成します。
$ sudo mkdir /var/www/foo.example.com /var/www/bar.example.com各ドメイン用のWebページはこれらのディレクトリに配置しますので、それらを配置するできるように適切な所有者とグループ所有者、および権限を必要であれば設定します。
$ sudo chown 所有者:グループ所有者 /var/www/foo.example.com /var/www/bar.example.com
$ sudo chmod 755 /var/www/foo.example.com /var/www/bar.example.com
バーチャルホストの設定ファイルを作成する
次にそれぞれのドメイン用にserverディレクティブを記述したファイルを、/etc/nginx/sites-availableディレクトリに作成します。
最初にfoo.example.com用のファイルを作成します。
$ sudo vi /etc/nginx/sites-available/foo.example.com記述する内容は次のとおりです。「server_name」にはドメイン名を、「root」には先ほど作成したディレクトリを設定します。
server {
    listen 80;
    listen [::]:80;

    server_name foo.example.com;

    root /var/www/foo.example.com;
    index index.html;

    location / {
        try_files $uri $uri/ =404;
    }
}
同様に「bar.example.com」用のファイルを作成します。
$ sudo vi /etc/nginx/sites-available/bar.example.com記述する内容は次のとおりです。
server {
    listen 80;
    listen [::]:80;

    server_name bar.example.com;

    root /var/www/bar.example.com;
    index index.html;

    location / {
        try_files $uri $uri/ =404;
    }
}
リンクを作成する
/etc/nginx/sites-availableにファイル作成しただけでは、このファイルは読み込まれません。このファイルが読み込まれるように/etc/nginx/sites-availableディレクトリにリンクを作成します。
$ sudo ln -s /etc/nginx/sites-available/foo.example.com /etc/nginx/sites-enabled/
$ sudo ln -s /etc/nginx/sites-available/bar.example.com /etc/nginx/sites-enabled/
設定ファイルを確認する
作成した設定ファイルに構文の誤りがないかチェックします。
$ sudo nginx -t-tオプションは設定ファイルをテストし、エラーがあればそれを表示します。
$ sudo nginx -T-Tオプションも設定ファイルをテストし、設定ファイルの内容を表示します。includeされたファイルは展開されて表示されます。
設定ファイルにエラーがないこと、および先ほど作成したファイルがincludeされていることを確認します。
nginxの再起動
nginxを再起動して設定を読み込みます。
$ sudo systemctl restart nginxバーチャルホストのテスト
実際にバーチャルホストの設定が動作するかテストしてみましょう。
まずはテスト用に次の2つのファイルを用意します。
/var/www/foo.example.com/index.html
/var/www/bar.example.com/index.html
index.htmlの中身は単なるテキストで構いません。例えば、次の内容を記述します。
This is foo.exmple.com site.ファイルが用意できたらブラウザから次のURLでアクセスします。
http://foo.example.com/
http://bar.example.com/
用意したテキストが表示されれば正常に動作しています。
ただし、上記のようにドメイン名でアクセスするにはDNSを設定するなどドメイン名を名前解決できるようにしておく必要があります。代わりにcurlコマンドで簡易的に確認することもできます。それには次のように実行します。
$ curl -H "Host: foo.example.com" http://localhost/
This is foo.exmple.com site.
$ curl -H "Host: bar.example.com" http://localhost/
This is bar.exmple.com site.
HTTPSに対応する
昨今ではHTTPSに対応することが当たり前のようになってきています。nginxで建てたWebサーバーもHTTPSに対応するようにしましょう。
HTTPSで通信できるようにするにはSSLサーバー証明書が必要になります。サーバー証明書はCA(認証局)が発行するもので、有償・無償のものがあります。
ここではLet's Encryptのサーバー証明書を利用します。Let's Encryptは無料で利用でき、レンタルサーバーなどでも利用も多いです。
Let's Encryptのサーバー証明書を利用するときには、Certbotという無料ツールを使うのが一般的です。Certbotを使うとサーバー証明書の取得からサーバーへの配備、そしてサーバー証明書の自動更新まで簡単にできるようになします。
サーバー証明書に有効期限があり、期限が満了する前に更新する必要があります。Let's Encryptの発行するサーバー証明書の有効期限は90日です。
Cerbotパッケージのインストール
まずはCerbotとそれに関連したパッケージをインストールします。
$ sudo apt install certbot python3-certbot-nginx次のコマンドで、サーバー証明書の取得からサーバーへの配備、およびHTTPSアクセスできるように設定が変更されます。証明書が必要なドメイン名は-dオプションに指定します。今回はマルチドメインなので-dを複数指定しています。
sudo certbot --nginx -d foo.example.com -d bar.example.comコマンドは対話形式で実行され、いくつか入力が求められますので適切な回答を入力していきます。
Saving debug log to /var/log/letsencrypt/letsencrypt.log
Plugins selected: Authenticator nginx, Installer nginx
Enter email address (used for urgent renewal and security notices) (Enter 'c' to
cancel): <メールアドレスを入力>
emailアドレスを入力します。このアドレスは緊急な更新やセキュリティ通知のために使われます。
- - - - - - - - - - - - - - - - - - - - - - - - - - - - - - - - - - - - - - - -
Please read the Terms of Service at
https://letsencrypt.org/documents/LE-SA-v1.3-September-21-2022.pdf. You must
agree in order to register with the ACME server at
https://acme-v02.api.letsencrypt.org/directory
- - - - - - - - - - - - - - - - - - - - - - - - - - - - - - - - - - - - - - - -
(A)gree/(C)ancel: A
利用規約に同意するかと言っているので、Aを入力して同意します。
- - - - - - - - - - - - - - - - - - - - - - - - - - - - - - - - - - - - - - - -
Would you be willing to share your email address with the Electronic Frontier
Foundation, a founding partner of the Let's Encrypt project and the non-profit
organization that develops Certbot? We'd like to send you email about our work
encrypting the web, EFF news, campaigns, and ways to support digital freedom.
- - - - - - - - - - - - - - - - - - - - - - - - - - - - - - - - - - - - - - - -
(Y)es/(N)o: N
メールアドレスを共有して通知を受け取れるようにするか?というような内容です。必要ないのでNを入力する。
Obtaining a new certificate
Performing the following challenges:
http-01 challenge for foo.exmple.com
http-01 challenge for bar.exmple.com
Waiting for verification...
Cleaning up challenges
Deploying Certificate to VirtualHost /etc/nginx/sites-enabled/foo.exmple.com
Deploying Certificate to VirtualHost /etc/nginx/sites-enabled/bar.exmple.com

Please choose whether or not to redirect HTTP traffic to HTTPS, removing HTTP access.
- - - - - - - - - - - - - - - - - - - - - - - - - - - - - - - - - - - - - - - -
1: No redirect - Make no further changes to the webserver configuration.
2: Redirect - Make all requests redirect to secure HTTPS access. Choose this for
new sites, or if you're confident your site works on HTTPS. You can undo this
change by editing your web server's configuration.
- - - - - - - - - - - - - - - - - - - - - - - - - - - - - - - - - - - - - - - -
Select the appropriate number [1-2] then [enter] (press 'c' to cancel): 2
「1: No redirect」はこれ以上設定を変更しない。「2: Redirect」はすべてのリクエストをHTTPSアクセスにリダイレクトする設定に変更します。HTTPへのアクセスはHTTPSへリダイレクトしたいので「2」を入力します。
Redirecting all traffic on port 80 to ssl in /etc/nginx/sites-enabled/foo.exmple.com
Redirecting all traffic on port 80 to ssl in /etc/nginx/sites-enabled/bar.exmple.com

- - - - - - - - - - - - - - - - - - - - - - - - - - - - - - - - - - - - - - - -
Congratulations! You have successfully enabled https://foo.exmple.com and
https://bar.exmple.com

You should test your configuration at:
https://www.ssllabs.com/ssltest/analyze.html?d=foo.exmple.com
https://www.ssllabs.com/ssltest/analyze.html?d=bar.exmple.com
- - - - - - - - - - - - - - - - - - - - - - - - - - - - - - - - - - - - - - - -
/etc/nginx/sites-enabledディレクトリは以下のファイルでHTTPをHTTPSへリダイレクトする設定に変更した旨のメッセージと、HTTP化が成功した旨のメッセージが表示されていれば問題ありません。また、テストするためのURLも表示されています。
IMPORTANT NOTES:
- Congratulations! Your certificate and chain have been saved at:
/etc/letsencrypt/live/foo.example.com/fullchain.pem
Your key file has been saved at:
/etc/letsencrypt/live/foo.example.com/privkey.pem
Your cert will expire on 2023-05-08. To obtain a new or tweaked
version of this certificate in the future, simply run certbot again
with the "certonly" option. To non-interactively renew *all* of
your certificates, run "certbot renew"
- Your account credentials have been saved in your Certbot
configuration directory at /etc/letsencrypt. You should make a
secure backup of this folder now. This configuration directory will
also contain certificates and private keys obtained by Certbot so
making regular backups of this folder is ideal.
- If you like Certbot, please consider supporting our work by:

Donating to ISRG /
証明書の保存先や秘密鍵の保存先が表示されます。そのほか今回取得した証明書の満了期限や更新方法も表示されています。また、アカウントの認証情報などが/etc/letsencryptディレクトリに保存されているので、定期的のこのディレクトリをバックアップすることが推奨されるとのことです。
HTTPSアクセスの動作確認
ここまでが完了したらHTTPSでアクセスできるようになっています。HTTPSでアクセスして正しくページが表示されることを確認しましょう。
https://foo.example.com/
https://bar.example.com/
また、HTTPへのアクセスがHTTPSへリダイレクトされることも確認します。
http://foo.example.com/
http://bar.example.com/
サーバー証明書の自動更新テスト
Let’s Encryptのサーバー証明書の有効期限は90日です。そのため有効期限が満了する前に証明書を更新する必要があります。
Ubuntuの場合、systemdのタイマーとして証明書の自動更新が既に設定されているので何かをする必要はありません。設定されているタイマーは次のコマンドで確認できます。
$ sudo systemctl status certbot.timer
$ sudo systemctl list-timers | grep certbot
また、次のコマンドを実行すると自動更新のテストが実施できます。
$ sudo certbot renew --dry-run成功した旨が表示されれば問題ありません。
まとめ
nginxは将来性のあるWebサーバーだと思います。機会があれば触ってみてはいかがでしょうか。